Taking great photos with your iPhone isn’t just about capturing moments but also reliving the experience after your trip ends. Knowing how to take compelling photos helps tell your unique travel story long after your journey.
To help you make the most of your travel photography, here are 12 essential tips to improve your iPhone shots and create images that capture the beauty of your adventures.
1. Experiment with Angles
Envision your scene from higher or lower angles than usual, thinking of different perspectives to find the perfect shot. For example, try capturing a landscape from a low angle to emphasize the foreground or shoot a portrait from a high angle to create a dramatic effect.
To get low-perspective shots, turn your camera upside down and bring your iPhone lenses as close to ground level as you can get.
If you have access to higher ground, then take the opportunity to capture exciting shots. Hike that mountain trail or climb that bell tower! You’ll get incredible photos, plus fabulous bragging rights. If the physical climb isn’t for you, seek out a rooftop restaurant or observation tower with breathtaking views.
Sometimes the available space makes it difficult to capture the full height of your photographic subject. For example, if you’re photographing a tower from a narrow town square, use the panorama feature on your iPhone by selecting Pano from your camera screen. Hold the camera horizontally and pan upwards from the ground to the top of the feature you want to capture.

2. Use Gridlines
Think beyond just placing your subject in the center of the photo. Instead, consider following the rule of thirds. Here’s how it works: Imagine your photo divided into a grid of nine equal parts with two horizontal and two vertical lines. The points where the lines intersect (one-thirds) are the points of interest in your photo.
The gridlines on your iPhone camera can show those one-third points, so you don’t have to measure manually. They also help you align your photos so your horizon line is perfectly horizontal. Make them appear by going to Settings > Camera > Composition, then turn on Grid.
Try placing the subject at one of these points to create a more balanced and visually pleasing photo.

3. Don’t Zoom In
The sad truth about the zoom feature on your iPhone camera is that the more you zoom in past the optical range of the lens, the poorer the quality of your photo. The digital zoom essentially crops the images and compensates for the missing details and pixels using AI-generated textures. Instead, try to get as close as possible to your subject or just crop it out from a non-zoomed photo.
4. Include People In The Picture
In addition to conveying scale, including people gives your photos a personal touch and engages your audience’s imagination. Consider shooting in portrait mode to make faces jump out and create a softly blurred background.
A Bluetooth shutter remote or the self-timer on your camera will allow you to place yourself within a composition. If you have an Apple Watch, you can also use it to take photos remotely when your camera app is open on your iPhone.
If you like taking selfies, try out the Mirror Front Camera setting so that your photos show your actual image rather than a mirror image. To turn it on, go to Settings > Camera, and select Mirror Front Camera under the composition category.

5. Shoot At Golden Hour
For outdoor photos, aim to shoot during “golden hour” or the time just after sunrise and just before sunset when the sun is lowest in the sky. The natural light casts a golden glow that can give your photos a warm, ethereal effect. An added benefit of sunrise is that there tends to be less foot traffic, so you can get photos without hordes of tourists in the frame.
Be aware though that the golden “hour” can be a misnomer. Depending on where you are in the world, you may only have 15 minutes or so to capture this quality of light.

6. Adapt to the Lighting
If you’re photographing outdoors in natural light, keep the light behind you and facing your subject. If it’s a time of day when the light is especially harsh, it may be best to shoot in the shade of a building or some trees.
Low-light conditions may not be your first choice for taking photos, but you can create evocative images using the shadows cast by the light outside a window or an almost-set sun.
Bad weather days can be ideal for creating photos with even light. Conditions like fog and rain can add a sense of atmosphere that puts a unique twist on those photos of iconic tourist sites. Bad weather may even turn into a great travel story one day!

7. Capture Long Exposures
Long-exposure shots can help you make the most of light and color. The high dynamic range (HDR) feature enables you to capture a wider range of colors. It takes multiple photos with different exposures, then combines them to create the ideal blend. It’s a great way to balance colors when photographing in extremely low or high light.
The Live Photos feature on your iPhone lets you capture a few milliseconds of video, which appears as a photo but reveals movement when you tap and hold the image. To turn on Live Photos, open the camera on your phone and tap the sunburst icon in the top right corner. The words “Live On” appear when the Live Photos setting is active. To achieve the effect, tap the edit option in the top right corner of the photo. At the bottom of the screen, tap the sunburst icon.
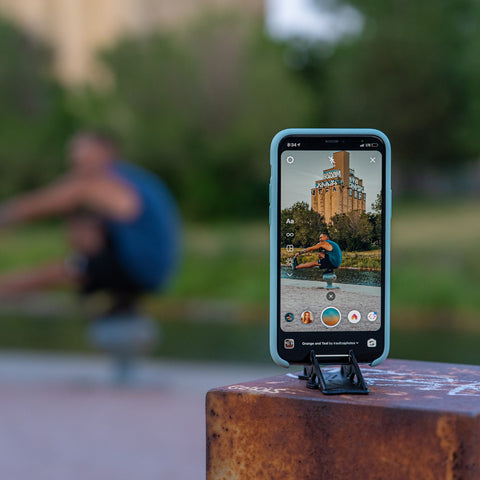
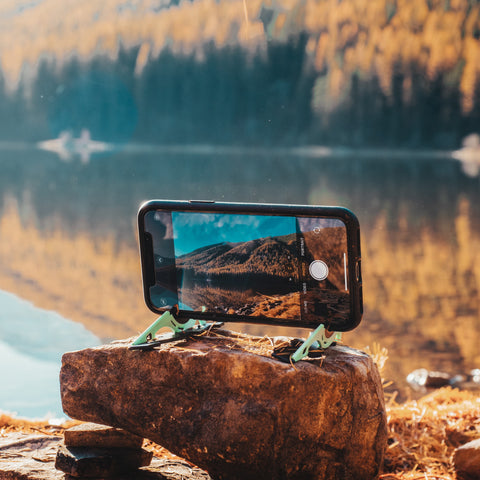
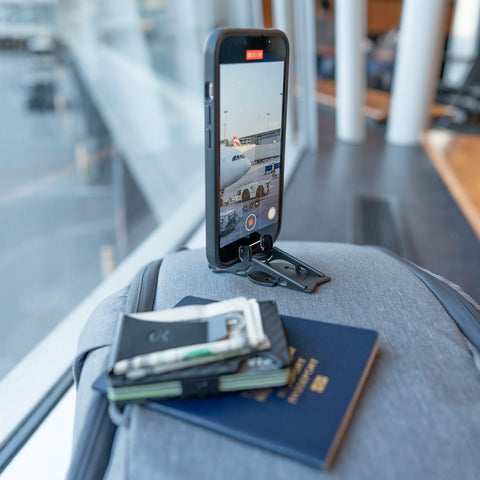
8. Bring a Travel Tripod
Keeping your phone stable is a must if you want to take clear, sharp photos. Since you’ll be out and about in new places, you want your travel tripod to be small and lightweight enough to fit your backpack. Every ounce adds up quick!
The Pocket Tripod Pro fits this bill, as it weighs only 0.4 ounces (that's not a typo), barely registering on the scale. It also independently adjustable legs that can split for more stability on uneven surfaces. This flexibility allows for compositions and stable shots no matter where your adventures take you.
If you don’t have a tripod, holding your phone with both hands will maximize stabilization. If you have access to a firm surface, steady yourself by leaning on your elbows. Using your hands for long exposure and time-lapse photography is always more risky though, as you won't be able to achieve ideal stability.

9. Shoot in RAW
Ever noticed how your photos sometimes change colors after you’ve taken them? If you want to reduce the automatic post-processing of your iPhone, you can shoot in ProRAW mode which is available on newer Pro iPhones.
You can access it by going to Settings > Camera > Formats > Apple ProRAW > ON.
When you take a photo, make sure to tap the RAW button in the camera app to enable it each time the scene is worth shooting in RAW. You don't need to use this format all the time though, as it takes up more of your storage and requires more time to edit.
10. Backup with iCloud
Don’t leave your storage to chance! Your iPhone can back up photos and videos directly to your iCloud account. Here’s how: In the Settings menu, tap the top of the screen where your name appears, then tap iCloud and select Photos. Select Optimize iPhone Storage to save smaller file sizes.
11. Edit Your Pictures
Your iPhone has built-in photo editing settings with options to enhance highlights and shadows as well as adjust for color vibrancy and saturation. Additionally, there are apps you can download to get more advanced editing options. Adobe Lightroom is a popular mobile editing app with presets that allow for faster, more consistent editing.
If you’re making videos, we recommend CapCut or Inshot for their excellent video editing features. In addition to experimenting with colors and brightness, these apps enable you to add fun transitions that make your videos more engaging and professional-looking.
12. Resize for Social Media
If you plan to post your photos on social media, you may find it easier to set your camera to take shots fitted to the limits of each platform. Here are the aspect ratios for several major platforms:
- Facebook Post – 16:9
- Facebook Story – 9:16
- Instagram Post – 4:5
- Instagram Story – 9:16
- Twitter – 16:9
- TikTok – 9:16
Tip: If you have settings on your iPhone camera that you like to use frequently, use the Preserve Settings feature to program them as presets. You’ll find this option in your camera’s Settings menu.
It’s easy to get so caught up in perfecting shots that you miss the experience itself. So here’s a reminder to not spend all your time on your phone! Many people express a post-travel regret of having paid so much attention to their camera that they failed to truly experience their surroundings.
While taking photos is important, remember that no picture can replace the feeling of being present in the moment. Don’t let the pursuit of the perfect shot keep you from enjoying where you are!
Related articles:
Best Mini Tripod for Your Mobile Phone